Planning to replace your old RV water heater? Interested in investing in energy-friendly items and reducing your electricity cost? Then, go for a tankless water heater. It will not only save energy and electricity cost but also allows for an easy and user-friendly installation. Though it is ideal to get the heater installed by the technicians, you can do so at home as well with some precautionary measures.
All you need to do is to properly uninstall the previous heater by following the precautionary measures listed in the installation manual and place the latest product in its place. However, despite the easy procedure, various RV owners still find it difficult to install a tankless water heater by themselves, therefore, I have brought a step-by-step guide on how to install a tankless water heater in RV along with various energy-saving tips and frequently asked question to help you with the DIY installation.
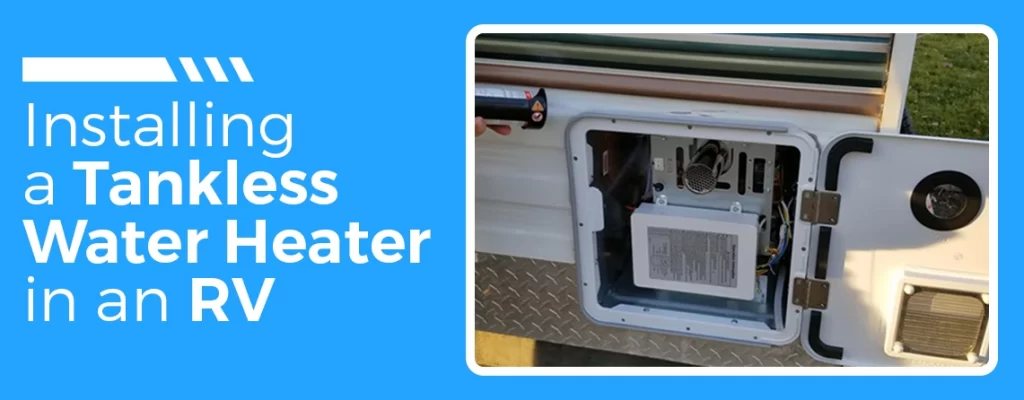
How to Install a Tankless Water Heater in an RV?
Steps for Installing Tankless Water Heater in RV
Turning off the Gas Supply
Now, this step marks the beginning of the installation of tankless water heaters in your RV. Before removing the old unit and proceeding further with the installation, you should turn off all the gas supplies to avoid an explosion or other unwanted accidents while installing the new unit. This is a precautionary measure and should be followed by switching off all the power sources that might be supplying electricity to the main unit. This will allow you to install the new heater effectively without any underlying concerns about gas leakage or short circuit.
Removing the Old Heater and Cleaning the Area
After you have made sure that all the gas supplies and electrical power sources have been disconnected from the tankless water heater, you should remove the old heater that was installed previously in your RV. Your new tankless water heater will be installed in the place of the old one to cover up the empty space and to prevent the issues of space unavailability if it is installed at a new location.
After the removal of the old heater, you should thoroughly clean the area and remove all the screws with the help of a screwdriver. Also, make sure that there is no dirt or debris located around the area where you will be installing the new heater. If you observe any dirt or sedimentation around the new area, use a clean cloth to clean the area properly and you are good to go.
Removal of Adhesive and Placing the New Heater
After you have cleaned all the dust from the location, use a heat gun to remove all the old residual adhesive that might be present in the place of installation. You can get the area checked by a technician or expert that will help you identify and remove the residual adhesive that can pose a threat to the installation of the new unit.
After you have successfully eliminated all the unwanted adhesives by yourself or with the help of the technician, you should go ahead with the installation of the new heater. Smoothly slid the new product into the empty space left by the previous one. Though I recommend choosing the new one with the same dimensions as the old one, however, if you still feel that the new heater is larger than the previous one, just use the drill to make space for the new one and place it in the newly created space. Make sure that it fits perfectly and does not leave any gaps.
Filling the Gaps
After you have inserted the new heater, check for any possible gaps that might be left in the area, especially if the heater is smaller than the previous one or if the space you have installed the heater in is larger than the heater itself. Firstly, you should properly screw the heater and avoid any loose screws. If the heater is not fitted properly it might fall after the installation. Then, look for possible gaps and fill those gaps using adhesive materials.
This can be carried out with the help of a glue gun. Adding the adhesive to the glue gun and then using it will help you in the application process and will ensure that you do not make a mess while applying the adhesive. Make sure that you apply the adhesive properly and do not leave any gaps that can become a problem in the future.
Placing the Door and Sealing the Outer Frame
The next steps involve placing the door on the outside of the heater if there is any. This can also be carried out by using the same adhesive material you used to secure the gas that was pressed around the unit. Installing the door and sealing it properly will help you avoid unwanted trouble or damage that might be incurred to the heater because of various physical and environmental factors present in the surroundings.
Then, again use the glue gun to seal the gaps of the outer frame for increased security. This will reduce the damage to a great extent and will ensure the proper functioning of the heater in the long term. Thus, offering you the best performance without damaging any component.
Reconnecting the Gas and Electric Supply
After you are done with sealing and placing everything properly, you should proceed with re-connecting the electricity and gas supply that you disconnected previously because of the fear of power outages and explosions. Reconnecting the electricity and gas supply will help you achieve the hot water supply anytime throughout the day and will help you enjoy a hot bath in your RV.
Connecting Wires and Installing Temperature Panel
Besides the reconnection of electricity and gas supply, you should also pay attention to the hot and cold water wires and should place them carefully for efficient working of the tankless water heater. This helps in achieving an adequate supply of hot water and helps you in the long term. After the successful connection of the sires, it is time to install the temperature panel. This is mainly installed to control the temperature of the water and modify it according to your convenience.
Check Tap for Hot Water Supply
Turn on the control panel to check the hot water supply. This will help you identify whether you have connected the wires properly and if the heater is working fine or not. I also suggest keeping the control panel temperature at a long level for better performance and energy efficiency.
Keeping the settings at a low level will help you in enjoying an endless hot water supply without consuming too much electricity in the process. After all these settings, if you observe that the tankless water heater is working properly and does not need any further adjustments, you can focus on other tasks.
Important Things to Note While Installing Tankless Water Heater in RV
Estimating the Cost of the New Tankless Water Heater for Installation
First and foremost, you need to calculate the overall cost of installing a new tankless water heater in your RV. This should include the prices of all the components and materials that are required for installation. The cost of the tankless water heater as well as the money paid to the technician if you are not installing it yourself should also be taken into account.
Although installing a tankless water heater is not a costly process, calculating everything at the beginning and aligning it with your budget can save you from future surprises and will also ensure that you do not go overboard with your finances.
Choosing Quality of the Product
Afterward checking the quality of the product you want to invest in is also highly important and therefore, you should properly assess everything before making a decision. Low-quality options will not only last for a short time but might also lead to other issues such as problems with the electricity supply or damage to the internal wires of the water heater.
Therefore, our best suggestion is to use a tankless water heater which is made up of stainless steel to achieve the required strength and durability for the long term. It will also protect your heater from the harmful effects of the cleaning agents that might be used to clean them after the accumulation of sediments present in the water. Similarly, another recommendation is to go for options that come with a warranty, which can be claimed later on in case of technical issues.
Availability, Convenience, and Energy Saving
You should also go for a tankless water heater that is energy-efficient and does not consume a lot of gas or electricity while heating the water. Now, this is essential whether or not you are worried about the cost of electricity or gas bills. Sustainable electricity consumption is the responsibility of every individual.
Hence, the heaters you should purchase must be aligned with this trail of thought. Definitely, besides energy efficiency, you will also get additional benefits such as reduced cost of electricity and gas. Who doesn’t love some extra dollars on the monthly electricity bills? Therefore, you must never neglect this feature.
Getting Help from Professionals
Finally, I will advise seeking technical support and help from experienced professionals during the installation to avoid unwanted accidents as well as damage to the product. They will use all the advanced tools and components required for the installation and will help you complete the whole process in a specified time. Doing so will not only relieve you from the hassle of doing everything by yourself but will also save a lot of your time that can be invested in other important tasks.
Frequently Asked Questions
How does a tankless water heater work?
Tankless water heaters are different from ordinary electric hot water heaters that keep reheating the water stored in the tank whether you need it or not. Instead, tankless heaters work only when they are activated and heat the water only for a required period of time when you adjust the temperature and turn on the tap. Therefore, they are energy-efficient in nature and do not consume a lot of electricity or gas.
How to replace your RV water heater with a tankless heater?
The process is simple and can be carried out by yourself if you follow the proper procedure. Firstly, you need to disconnect the electricity and propane supply. Then remove the old heater and replace it with the new one after cleaning the area. Finally, reconnect all the wires and install the temperature control panel to adjust the heating temperature according to the requirements and you are good to go
Can you install a tankless water heater yourself?
Yes, you can install a tankless water heater by yourself. However, this must be carried out with proper precautions and the procedure listed in the installation manual such as disconnecting the power supply and removing the residual adhesives before installing a new product. If you feel at any point that you are unable to carry out the installation by yourself, then immediately contact the technicians and let them complete the job for you.
Wrapping Up
Tankless water heaters are relatively easier to install especially if your RV had a water heater installed previously and you do not have to drill additionally for the installation of the new version. Though you can install tankless water heaters by yourself, I highly suggest taking technical support to avoid any accident or damage to the heater during installation.
However, if you still proceed with DIY installation, make sure to follow all the instructions properly and take precautionary measures to avoid accidents and damage to the main unit. You can uninstall the previous unit after disconnecting the power and gas supply and then place the new heater on the palace of the new one. Then reconnect all the wires and electricity supply and install the temperature control panel to complete the installation process.
With years of experience under his belt, Adam decided to put his water heater knowledge to work. By providing high-quality content and expert guides, Adam hopes to help anyone looking for expert water heater advice.